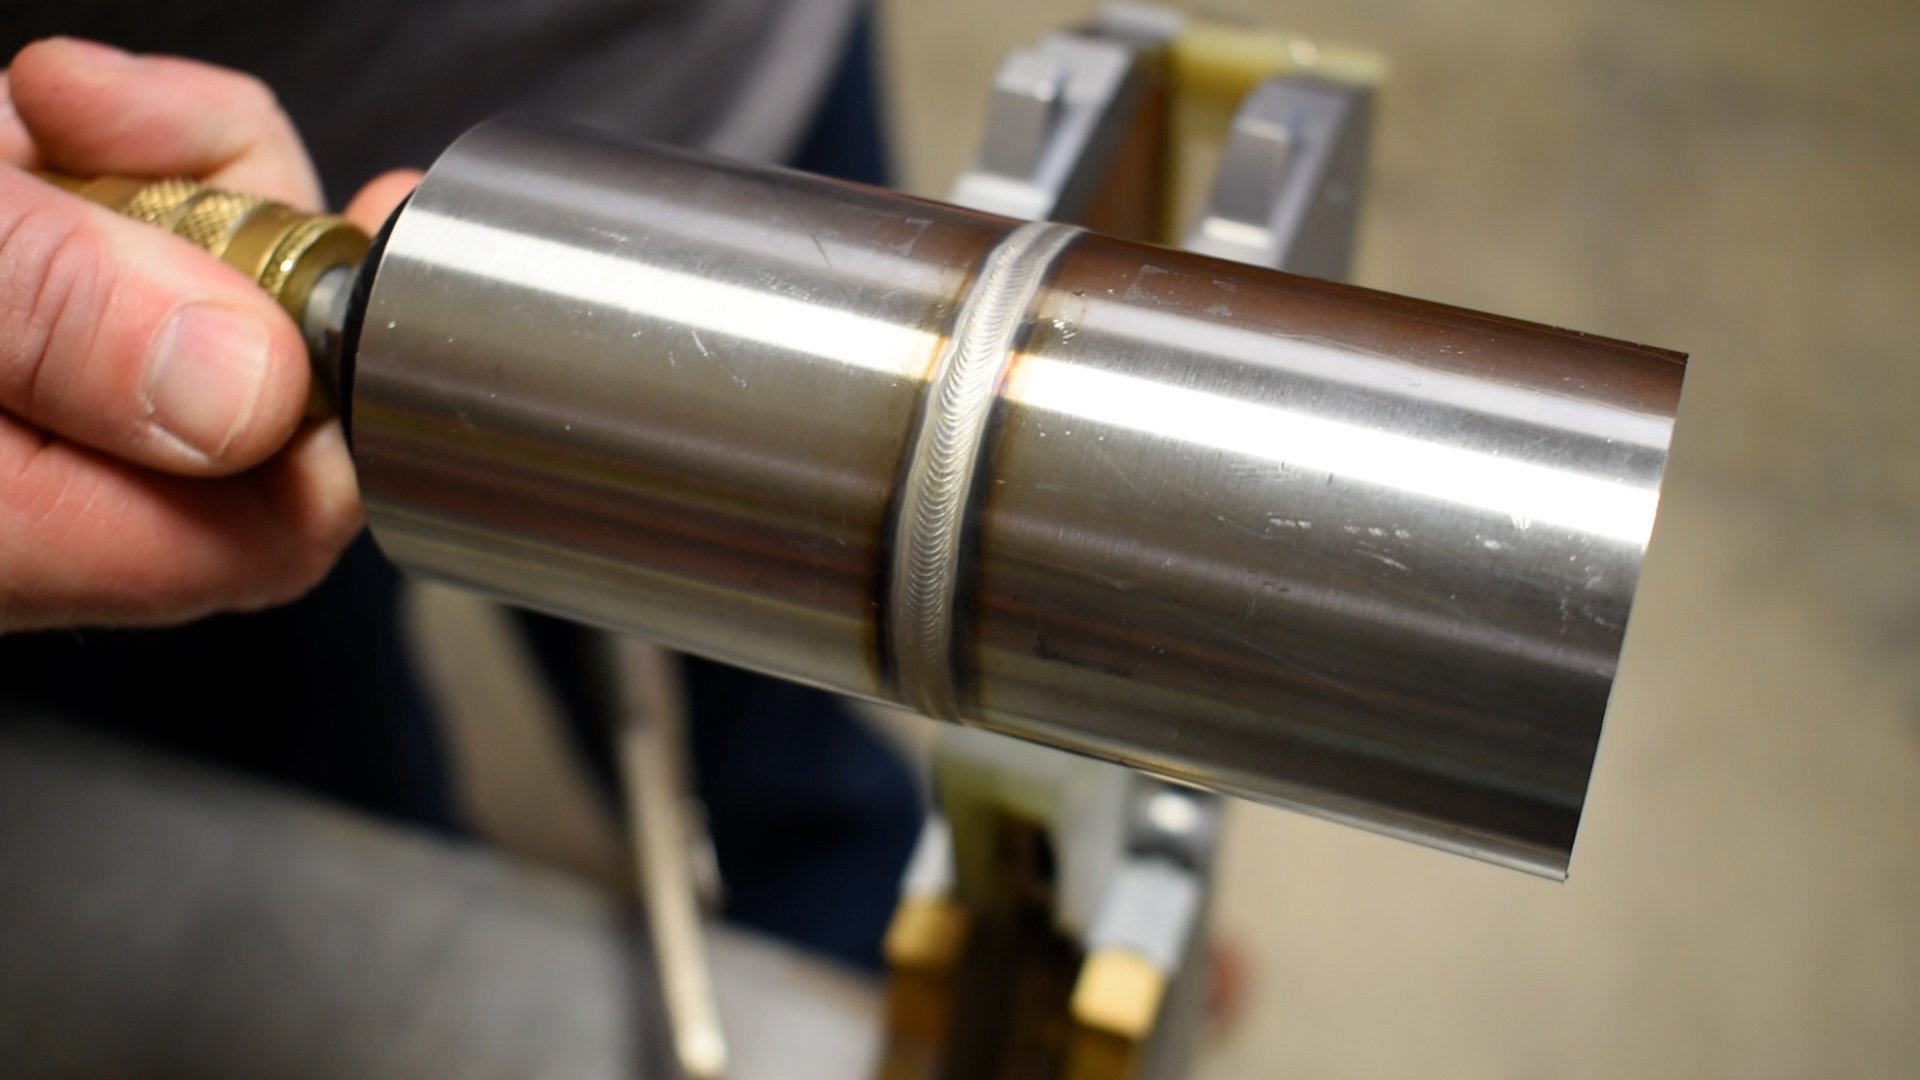
Orbital welding is a semi-automated process designed to deliver highly consistent, repeatable welds, especially in applications where precision and cleanliness matter.
Understanding the full process will help you determine whether orbital welding is the right fit for your application. Below is a step-by-step breakdown of how it works.
Note: The process differs slightly between tube and pipe welding. Be sure to confirm which applies to your application.
Don't have time for the full article? Check out our beginner's guide video:
1. Cutting
Before aligning tube or pipe ends, they first need to be cut to length. Proper preparation is critical to weld quality as small inconsistencies at this stage can lead to defects later in the process. That's why orbital saws are commonly used on sanitary tubing and thin-walled pipes.
Orbital cutters rotate 360 degrees around the tube or pipe to create a clean, accurate cut. They can be adjusted to fit a range of sizes without deformation, and cuts can be made in around 20 seconds, allowing you to get a clean, consistent cut quickly and efficiently.
If you don’t have an orbital saw, you can still get a clean, square cut with a traditional saw by using tube/pipe saw blocks. These saw vises clamp securely onto the tube or pipe and guide the saw during the cut, keeping the blade aligned so the cut remains square.
For larger pipe applications, a clamshell cutter is recommended, such as the ESCO COHOG.
2. Facing or Beveling
After cutting, the tube or pipe should be faced with a tube facing tool to remove burrs and imperfections. This ensures proper fit-up and consistent weld results.
For heavy-walled applications requiring filler wire, the tube or pipe will need to be beveled for a clean fit-up. For most wire-added orbital welds, a J-bevel is generally recommended, but every application is different and yours may require a different type of bevel. Some beveling tools will face, bevel, and counterbore simultaneously.
Want to learn more about pipe beveling? Download our Pipe Beveling 101 guide!
3. Cleaning
Cleanliness is critical—especially for stainless steel or sanitary applications. Contaminants like oil, grease, or debris can lead to defects such as porosity or inclusions.
To prevent this, wear gloves to avoid introducing oils from your hands, and use alcohol with a clean, lint-free cloth to wipe surfaces and remove impurities.
4. Consumables
To strike an arc, you'll need an electrode. For orbital welding, 2% ceriated tungsten is recommended. Keep in mind that tungsten used for hand welding differs from tungsten used in orbital welding.
For repeatable weld, the tungsten must be consistently manufactured and fit to your application specifications, including the weld head being used and the tube or pipe's outside diameter (OD) size. Once you have the right tungsten, place it within the weld head's tungsten holder.
Wanting more in depth info on tungsten? Download our Orbital Tungsten Handbook!
If you are orbital welding pipe with wire added, you will need to add filler wire to your open weld head. In most applications, the welding specifications will give recommendations on the type of material to be added. You can find wire options at your local welding supply store.
Orbital weld heads cover a range of tube sizes. For example, one weld head could weld tubes from ½” up to 2”. This could require installing the correct size collets or cassettes. Collets are easy to install and allow you to work across multiple size ranges without needing multiple weld heads.
5. Alignment (Fit-up)
Fit-up is critical in orbital welding. Consistent fit-up leads to consistent weld results, which is why alignment is so important. When placing the workpieces, align the joint of the two pieces with the tungsten electrode.
Tube tacking clamps can also be used to align sanitary tube and pipe applications. These simplify the alignment step and are an easy way to ensure the fit-up.
For applications with a greater wall thickness, counterboring helps the landing fit-up by removing material from the I.D.
6. Purging
Purging removes oxygen from inside the tube before welding. This is done by filling the tube with argon or a mixed shielding gas using a purge plug kit. Purge plugs seal the tube ends and distribute gas evenly throughout the interior.
It’s important to purge the tube to prevent sugaring on the backside of your weld and it helps keep the weld from becoming concave. If sugaring does occur, it can be very problematic for many industries where bacteria can grow in these conditions, particularly the process piping industry.
We have options for purging pipe, such as rigid purge dams, inflatable purge bags, and traditional purge plugs.
7. Programing
The weld program provides instructions for the power supply and weld head. Modern power supplies often feature auto-programming capabilities.
By simply entering variables such as the weld head model, material being welded, outside diameter, and wall thickness, the power supply will generate a pre-developed welding program. In many cases, only minor adjustments are needed.
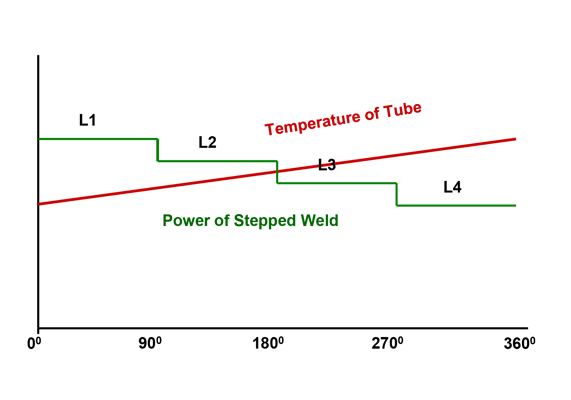
Welds are typically divided into four or more levels, or segments, executed in either step or continuous motion. The initial levels will need more heat (higher amperage) while the later levels need less (lower amperage) to prevent the piece from becoming overheated.
Want to fully understand the programming needs? Schedule an orbital welding training with our experts!
8. Welding
When all of these steps are completed and the program is ready, it’s time to strike an arc. Once the start button is pressed, the program will initiate. It follows this automated process:

-
Pre-Purge
First, the pre-purge will run for the designated amount of time. This is to remove any oxygen from the workpieces.
-
Travel Delay
During the travel delay, also known as the rotation delay, the tungsten stays in place while the weld puddle is established. This helps establish a stable arc and achieve proper penetration.
For thick-walled pipe or tube, you may have a longer travel delay due to the thickness of the base material. After you establish a puddle you will add wire before the electrode travels.
-
Pulsing
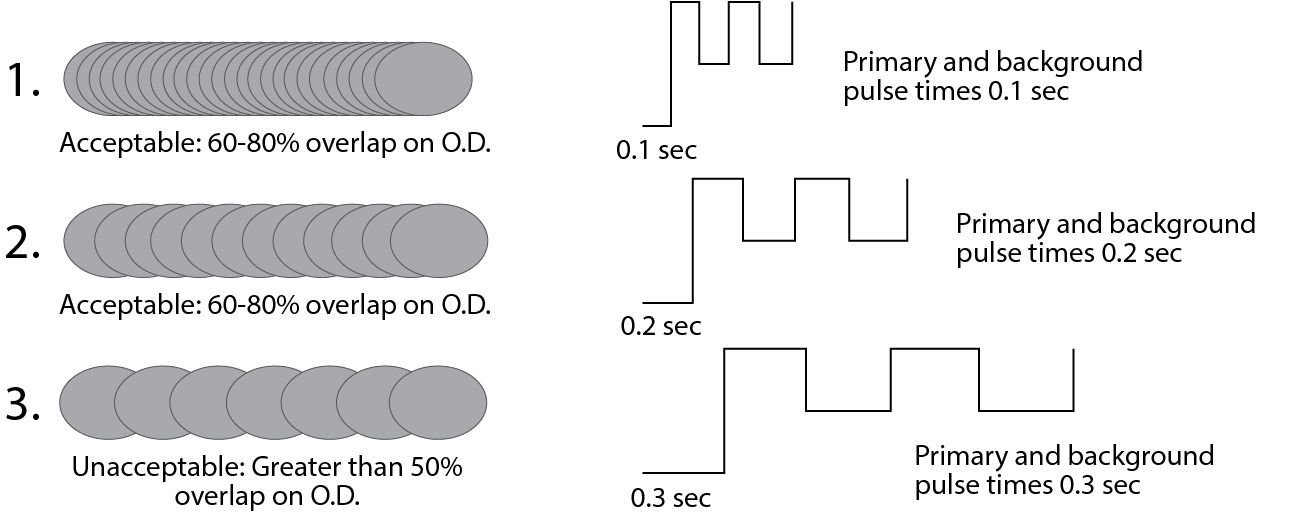
The electrode will travel around the workpiece while pulsing in both primary (high) pulse and background (low) pulse. These pulse amperages and times within the welding program will determine your weld bead overlap. The travel speed will be determined by the program and the amperage will also change with the level position.
-
Tie-In and Downslope
After the electrode travels 360 degrees back to the starting position, it will then continue for another 10 degrees to "tie-in" or overlap the weld.
Then the downslope will begin, this is when the head will slowly bring the amps down giving the weld puddle a teardrop or dovetail effect. This closes the puddle and prevents any deviations or weld defects at the end of the weld. Most downslopes are somewhere between 4-12 seconds depending on the OD of the tube/pipe.
-
Post-Purge
Once the downslope is complete, the arc shuts off and the head purges gas for 15-30 seconds. This helps with the color and cooling process of the metal. Then, the weld is considered complete.
After conducting an initial test weld, the program can be modified to best suit the needs in your application.
Orbital welding is built around consistency. When each step is performed correctly, the result is a repeatable, high-quality weld with minimal variability.
By understanding the full process, you’re able to determine whether orbital welding is right for your application requirements. If precision, cleanliness, and repeatability are critical to your next job, orbital welding may be the right solution.
Think orbital welding could be a good fit for your next project? Get in touch with us! We’d love to chat about your application and needs.

.png?width=520&height=294&name=Blog%20Featured%20Image%20(3).png)
.png)
Comments